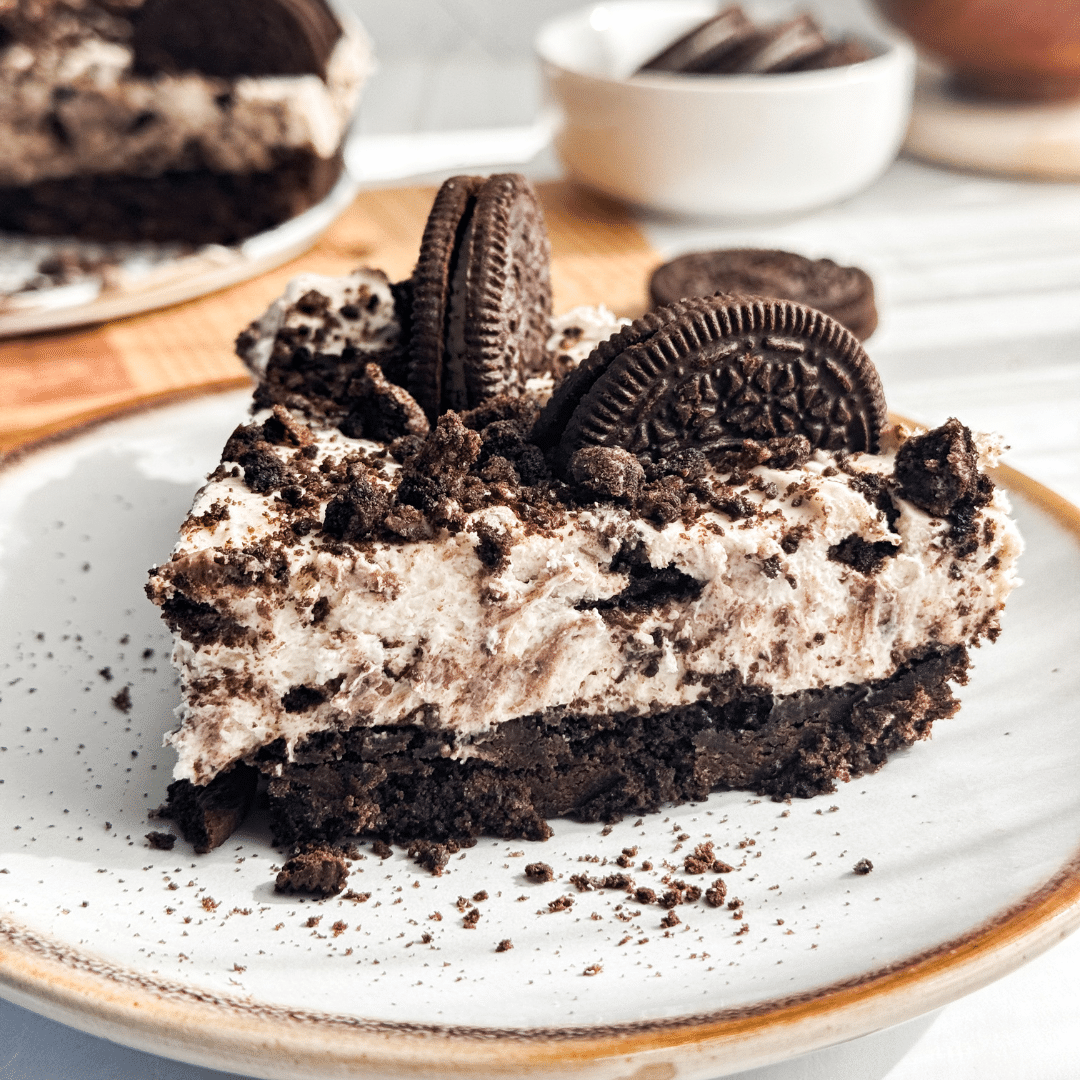
This No-Bake Oreo Cheesecake is the kind of dessert that gets absolutely demolished at parties. We’re talking fluffy, creamy, cookie-studded cheesecake filling piled high on an Oreo crust—with no oven and zero stress. It’s rich, dreamy, and shockingly easy to throw together. All you need is a mixing bowl, a springform pan, and a little fridge time.

Perfect for summer, holidays, potlucks, or when your sweet tooth is demanding something cookies-and-cream stat.
why you'll love them!
- No oven needed! Perfect for summer or any time you don’t want to turn on the heat.
- Only 7 ingredients. All pantry staples or easy-to-find fridge items.
- Ultra-creamy texture. Whipped cream gives it that airy, mousse-like feel.
- Make-ahead magic. Chill it the night before and serve when ready—stress-free!
- LOADED with Oreos. In the crust, in the filling, on top… enough said.
No Bake Oreo Cheesecake Ingredients
No measurements here. Just the why behind each ingredient.
- Oreo Cookies: You’ll need these for both the crust and the filling. Regular Oreos (not Double Stuffed) work best! You’ll crush some into fine crumbs for the crust and chop others for folding into the filling and topping.
- Butter: Melted butter binds the Oreo crumbs together into that buttery, compact crust. Unsalted is great here, but salted works if that’s what you’ve got.
- Cream Cheese: This is your cheesecake base! Make sure it’s softened to room temp for a silky-smooth filling. And yes—full fat is a must for the creamiest texture.
- Powdered Sugar: It dissolves right into the cream cheese for a smooth, sweet finish (without any grit you’d get from granulated sugar).
- Vanilla Extract: Just a splash gives you that classic cheesecake flavor.
- Heavy Whipping Cream: This is what keeps your cheesecake light and mousse-like instead of dense. You’ll whip it to stiff peaks and gently fold it in for a fluffy texture that still holds its shape.

Tips, Tricks, and Substitutions
- Use a springform pan for the prettiest slices and easy serving.
- Don’t skip the chill time! The cheesecake needs at least 6 hours in the fridge to fully set (overnight is best).
- Crush Oreos finely for the crust, but leave some bigger chunks in the filling for texture.
- No food processor? Crush your cookies in a zip-top bag with a rolling pin.
- Want to make it fancy? Drizzle with melted chocolate or pipe whipped cream around the edges before serving.
- Make it gluten-free: Use gluten-free chocolate sandwich cookies in place of Oreos.

FAQ
How long does this need to chill?
At least 6 hours, but overnight is ideal for the cleanest slices and firmest texture.
Can I freeze it?
Yep! Once fully set, wrap it tightly and freeze for up to 1 month. Let it thaw in the fridge before serving.
Can I use whipped topping (like Cool Whip) instead of heavy cream?
You can! Swap in about 2–2½ cups of thawed whipped topping if you’re short on time or want a shortcut.
Can I use Double Stuf Oreos?
They’re a little too creamy for the crust, but okay in the filling if that’s all you have. Stick with regular Oreos for best structure.
What if I don’t have a springform pan?
You can use a regular 9-inch pie dish or square baking pan—just line it well with parchment so you can lift it out easily.

If you make this No Bake Oreo Cheesecake, I would really appreciate a comment and rating down below, under the recipe card. Don’t forget to take a picture and tag me over on Instagram, Tik Tok, or Pinterest. For more ideas, check out my Dessert Recipes page.

No Bake Oreo Cheesecake
Ingredients
For the Crust
- 24 oreos
- 5 tbsp melted, unsalted butter
For the Filling
- 16 oz cream cheese, softened
- 3/4 cup powdered sugar
- 1 tsp vanilla extract
- 1 1/4 cups heavy whipping cream
- 12 Oreo cookies, crushed folded into the filling
- extra Oreos for topping
Instructions
- Blitz Oreos into fine crumbs using a food processor (or crush in a zip-top bag with a rolling pin). Mix with melted butter until the texture is like wet sand. Press into the bottom of a 9-inch springform pan. Use a flat-bottomed glass to pack it down firmly. Chill in the fridge while you make the filling.
- In a cold mixing bowl, whip the heavy cream to stiff peaks (you should be able to turn the whisk upside down and it holds shape). Set aside.
- In a separate large bowl, beat cream cheese until smooth and fluffy. Add powdered sugar and vanilla and beat until fully incorporated and silky. Fold in the whipped cream gently, then stir in the crushed Oreos.
- Spoon the filling over the chilled crust and smooth the top with a spatula. Add extra Oreo chunks on top if you want that extra flair.
- Cover and refrigerate for at least 6 hours, preferably overnight, until firm and sliceable.
- Carefully remove from the springform pan, slice, and enjoy cold. Pro tip: run your knife under hot water for clean cuts!